
How to Configure SIP Trunk for FCM630A from PSTN in (Egypt)
To establish connectivity between the PSTN and IPPBX(B), we need to establish a connection between the two systems. This will allow extensions can directions to communicate with PSTN in 30 channels.
PSTN Gateway
Model: FEG4301
Ip: 192.168.0.101
IPPBX
Model: FCM630A
Extensions Range from 1000 to 1009
Ip: 192.168.0.102
TOPOLOGY

1- CONNECT FEG4301 TO FCM630A USING PEER SIP TRUNK
1.1- Create SIP Trunk on FEG4301
Login into FEG4301 web GUI.
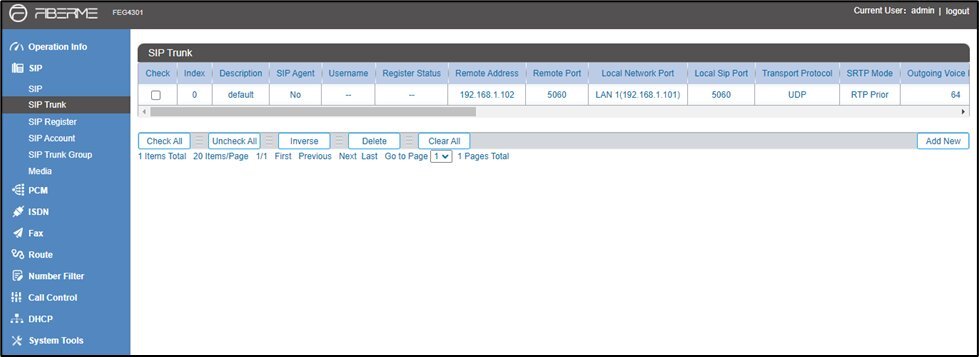
On FEG4301 web GUI, to create a peer SIP trunk, navigate to “SIP-> SIP Trunk -> Trunks” and then click “Add” to configure a new trunk.
Remote Address: IP the IPPBX FCM630A ( 192.168.0.102 )
Remote Port: 5060
Local Network Port: ANY LAN

Navigate to “SIP trunk group”, then click “Add” to configure a new trunk.
Add SIP trunk that was created before.
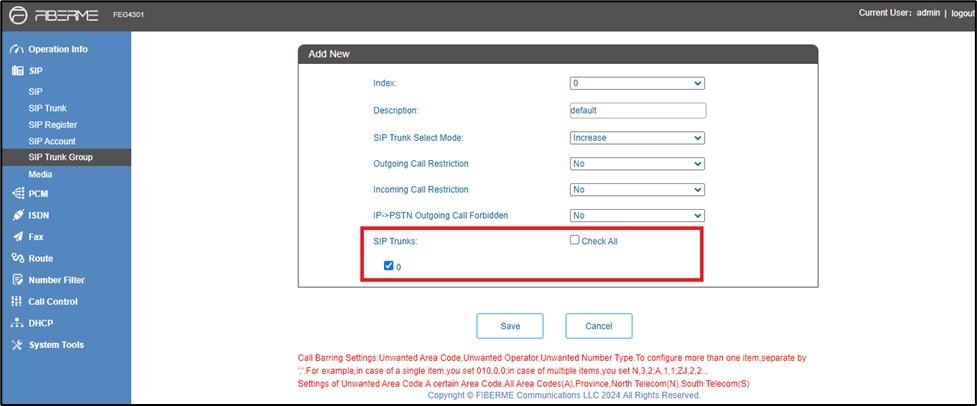

A new trunk has been configured
1.2- Create SIP Trunk on FCM630A
Login into FCM630A web GUI.
On FCM630A web GUI, to create a peer SIP trunk, navigate to “Extensions/Trunks” and then navigate to” VOIP Trunks” click “Add SIP Trunk” to configure a new trunk.
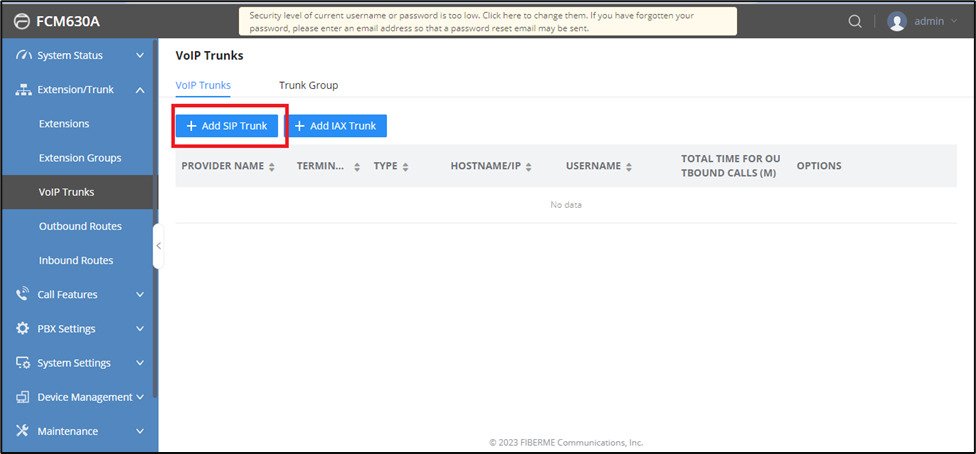
To establish a peer SIP trunk between FCM630A and FEG4301, First, make sure that the type of the trunk is “Beer SIP Trunk” and enter a name for the trunk, then on the “Server Address” field enter the IP address and port of FCM630A which in this scenario is “192.168.0.101 “

Press “save”, and then press “edit”
Navigate to “Advanced Settings” and then check mark in “Enable Heartbeat Detection “

To know the status of trunk navigate to “System Status -> Dashboard“

A new trunk has been configured
2- CALL ROUTING ON FEG4301
Navigate to “PCM -> PCM Trunk ” then click on “Add” Button
– Click on Chick All to select the channel.
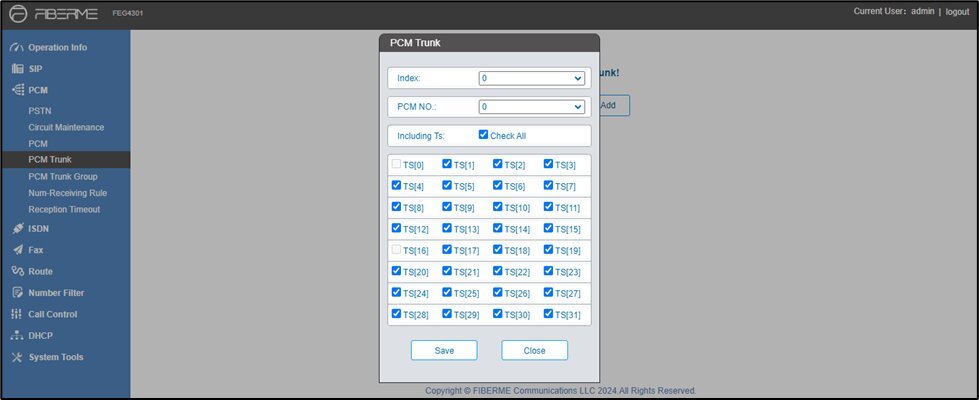
Navigate to PCM trunk group.
– Add PCM trunk that was created before.


Navigate to “ ISDN -> ISDN Settings ” then click in “ Default Callee Type ” Button
– Change to ” Unknown (0X81) “

Configure Outbound Routes on FEG4301
Navigate to “ Route -> “IP-> PSTN” “
Call Source: sip Trunk Group [0]
CallerID Prefix: *
CalleeID Prefix: *
Call Destination: PCM Trunk Group [0]
Click on “save” to save to rule details.


Configure Inbound Routes on FEG4301
Navigate to “ Route -> “PSTN->IP “ “
Call Source: PCM Trunk Group [0]
CallerID Prefix: *
CalleeID Prefix: *
Call Destination: SIP Trunk Group [0]
Click on “save” to save to rule details.


A new route has been configured.
3- CALL ROUTING ON FCM630A
3.1- Configure Outbound Routes on FCM630A
Navigate to “Extension/Trunk -> Outbound Control” then click on “Add” Button
then give a name to this rule “To FEG4301”,
– In the Pattern field, please write: X.
{ Pattern “X.” It means the dialed any numbers }
From “Privilege Level” select the privilege level of extension can use this rule .
From “Main Trunk” please select the trunk that you created “TO_FEG4301“
Click on “save” to save to rule details.
Click on “Apply Changes” in the top right of the page to apply all changes.


A new route has been configured.
3.2- Configure Inbound Routes on FCM630A
Navigate to “Extension/Trunk -> inbound Control” then choose the SIP Trunk FEG4301 and click Add

To set an inbound route you need to determine some credentials:
1. Name “ From_FEG4301”
2. Pattern “ X.“
3. Destination “ Extinction ”
[ We can choose IVR, queue, ring group, or more options.]


A new route has been configured.
Still stuck?
FIBERME support can look at your setup with you. Certified Partners can also ask in the FIBERME Community, and anyone can learn the systems step by step in the free courses of FIBERME Academy.