To establish cloud-based access to your extensions from any IP-PBX, Nexusage can be installed and configured on Proxmox. This deployment enables the extensions to be used remotely through FRC
IN PROXMOX #
– Log in to Proxmox
– Navigate to Datacenter -> local -> ISO
– Upload Nexusage ISO
– Select File -> Upload

– Navigate to Create VM
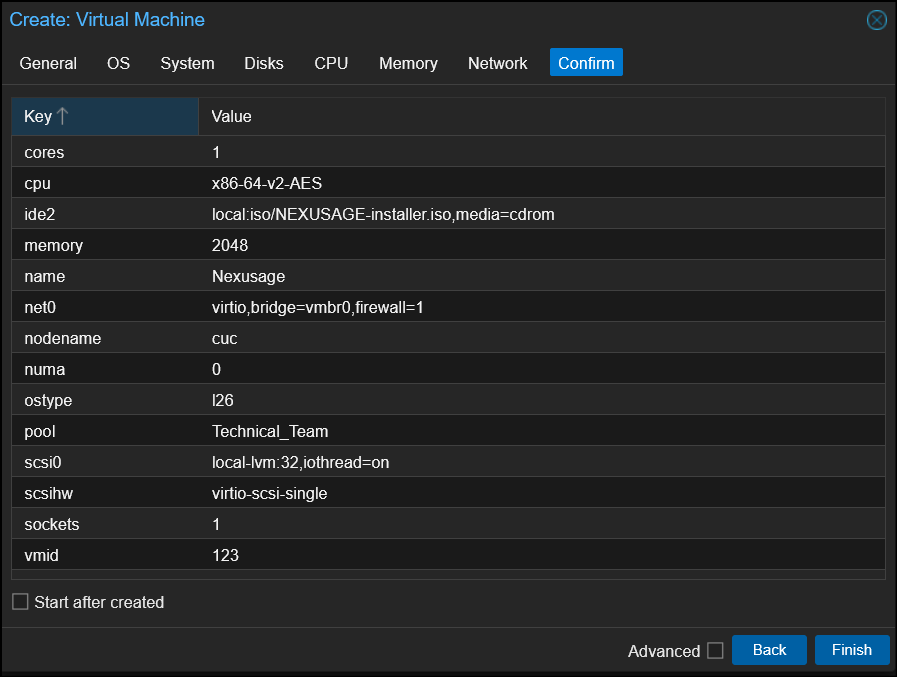
General
- Choose Node
- Write VM ID:123
- Write Name: Nexusage
OS
- Use CD/DVD disc image file (iso): choose Nexusage ISO
Disks
- Disk size (GiB): Minimum 16GB
Memory (RAM)
- Memory (MiB): Minimum 2GB
CPU – Network
Choose what you need
In NEXUSAGE #
After power on the VM

will ask you about the hard disk
- Choose: Yes

At the end, it will display the access credentials and network settings
Default username and password
Username: admin
Password: Admin@123
Ethernet (DHCP)
IP – subnet mask – gateway – DNS

To login to your NEXUSAGE UI, open the displayed IP address on your browser: https://youripaddress:8090


