
How to configure 3CX to FAG410X using peer SIP trunk
To establish connectivity between the 3CX and FAG410X, we need to configure a trunk between the two systems. This will allow extensions using external PSTN trunk connections.
On this page
IPPBX
Model: 3CX
IP: 192.168.99.50
GATEWAY
Model: FAG410X
Ip: 192.168.99.239
TOPOLOGY
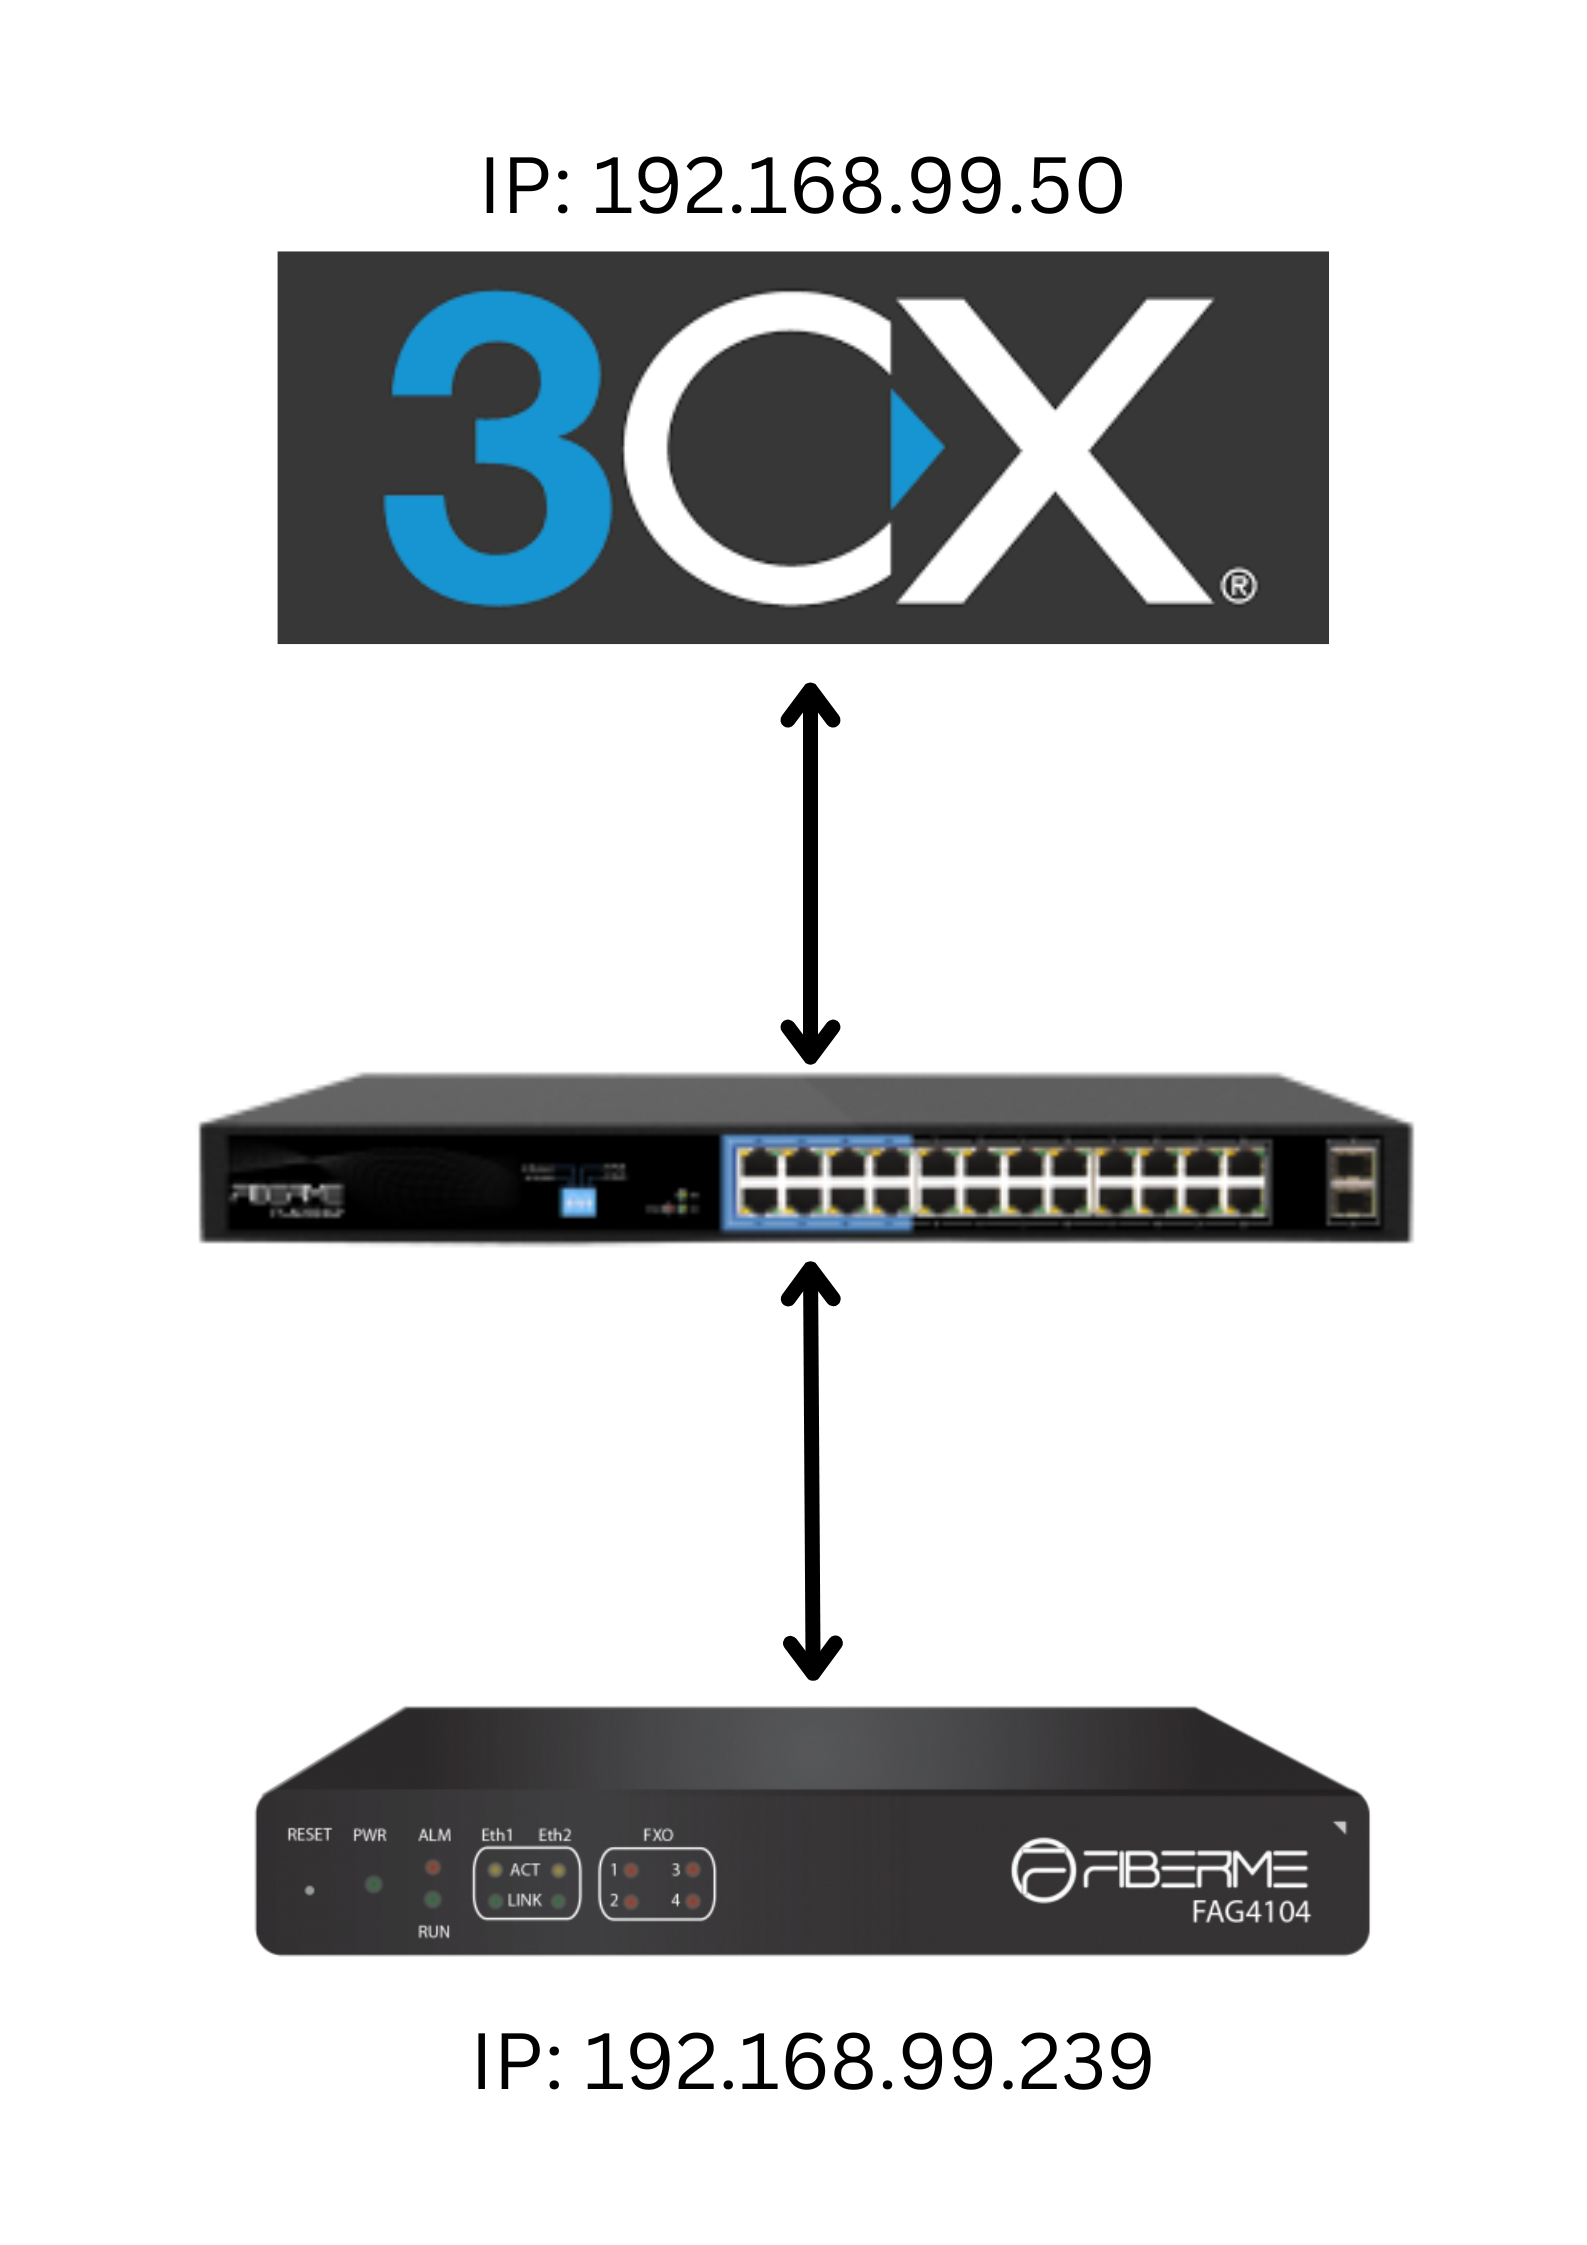
Connect 3CX to FAG410X using peer SIP trunk#
Create Digital Receptionist On 3CX#
On the 3CX web GUI, create a Digital Receptionist extension under Digital Receptionist ->Add.
You can assign the ” Menu Options ” to different destinations.

Create Peer SIP TRUNK On 3CX#
On the 3CX web GUI, create a peer SIP trunk under SIP Trunks ->Add SIP Trunk. In this example, the FAG4108 IP address is 192.168.99.239.
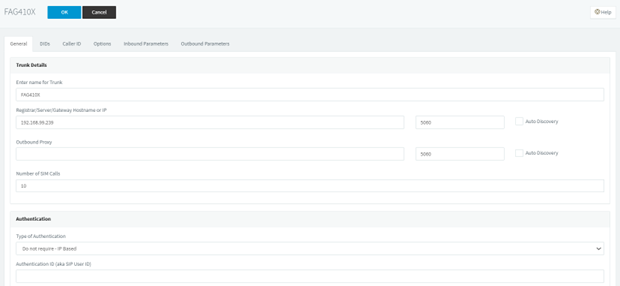
Configure Outbound Rule on 3CX#
1- On 3CX web GUI, go to Outbound Rules ->Add to create a new outbound rule. This would allow the extension on 3CX to reach numbers in PSTN network via the peer SIP trunk we just configured.

2- In this example prefix “9”, 9 is the first dialing digit and it will be stripped off when the call goes out.
Configure Inbound Rule on 3CX#
On 3CX web GUI, go to Inbound Rules ->Add DID Rule to create a new inbound rule. In this example, we set the DID as 20000, which will be used in the FAG410X call forward setting.
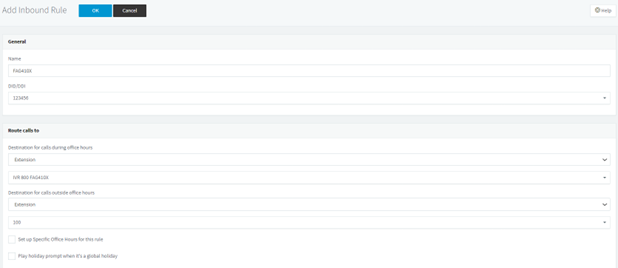
The default destination for calls is configured to IVR (Digital Receptionist). Ensure to select the proper IVR.
Connect FAG410X with 3CX#
1- On the FAG410X web GUI, go to the VoIP->SIP page and enter the IP address of the 3CX Server that you are peering with.
2- Please make sure the Register Gateway option under VoIP-> SIP is set to No. In the following example, 3CX Server has IP address 192.168.99.50.
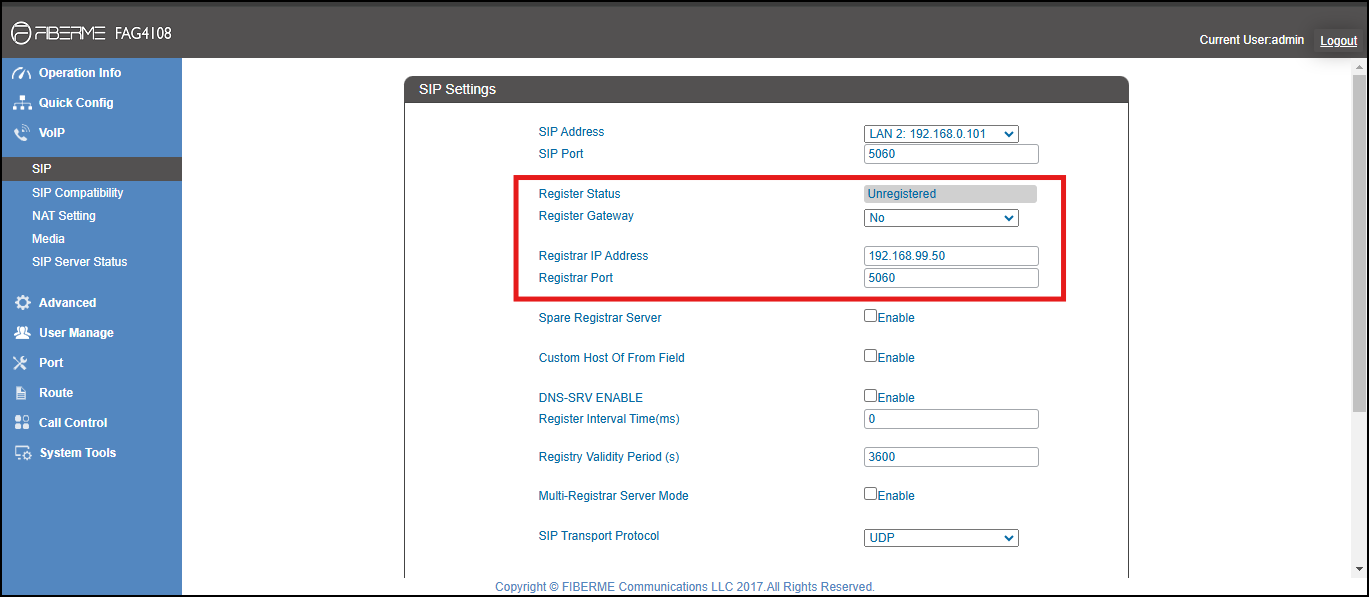
Configure FXO Port on FAG410X#
1- Connect the PSTN line to the FAG410X FXO port.
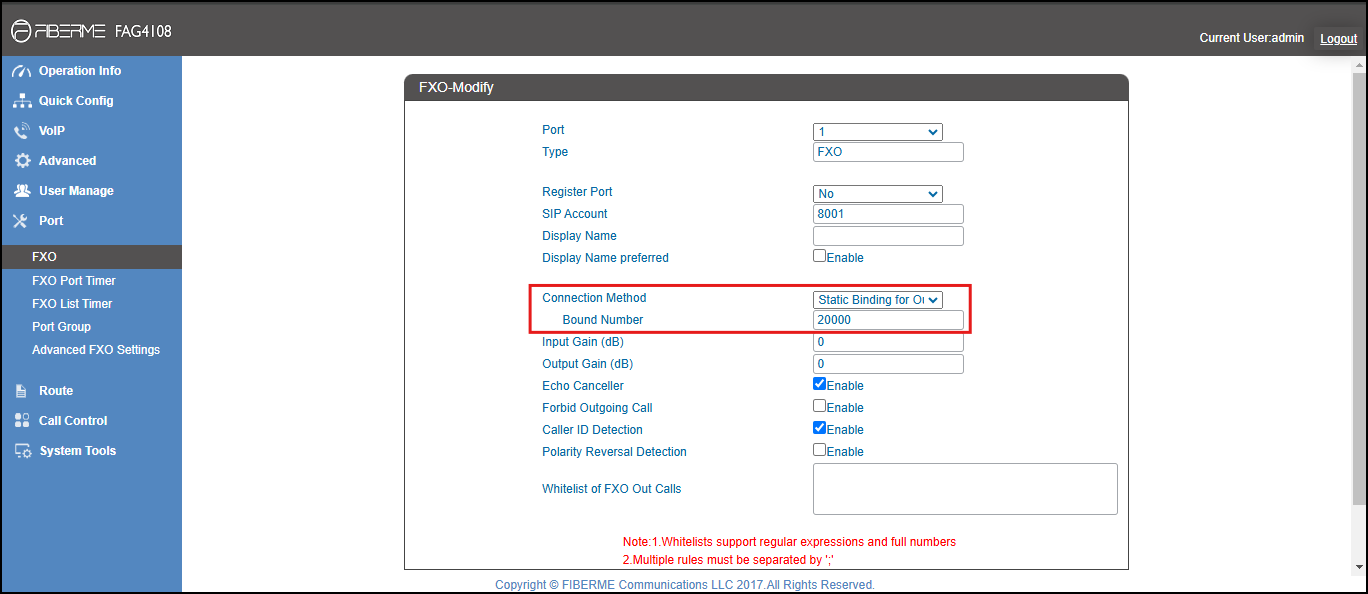
2-On the FAG410X web GUI, go to the Port->FXO page and press Modify on the FXO port you will use.

3- Make Connection Method (Static Binding for outgoing/incoming call)
4- Write Number 20000 to be matched with the DID number we configured in 3CX Inbound Route.
Create Port Group on FAG410X#
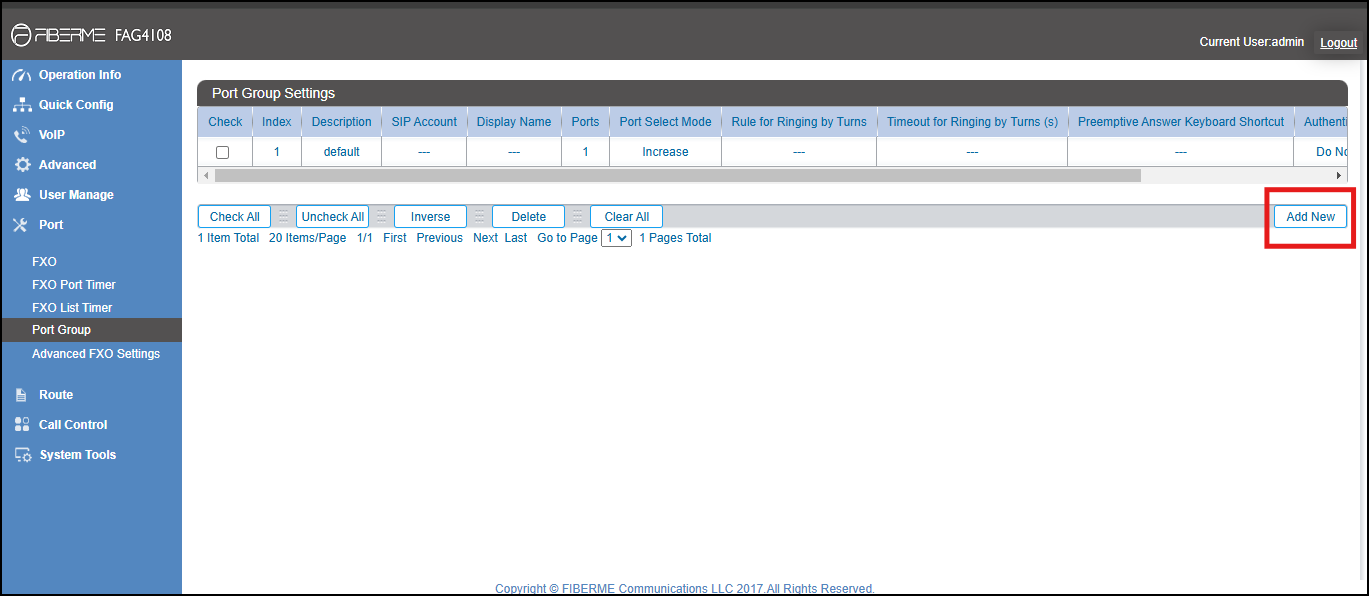
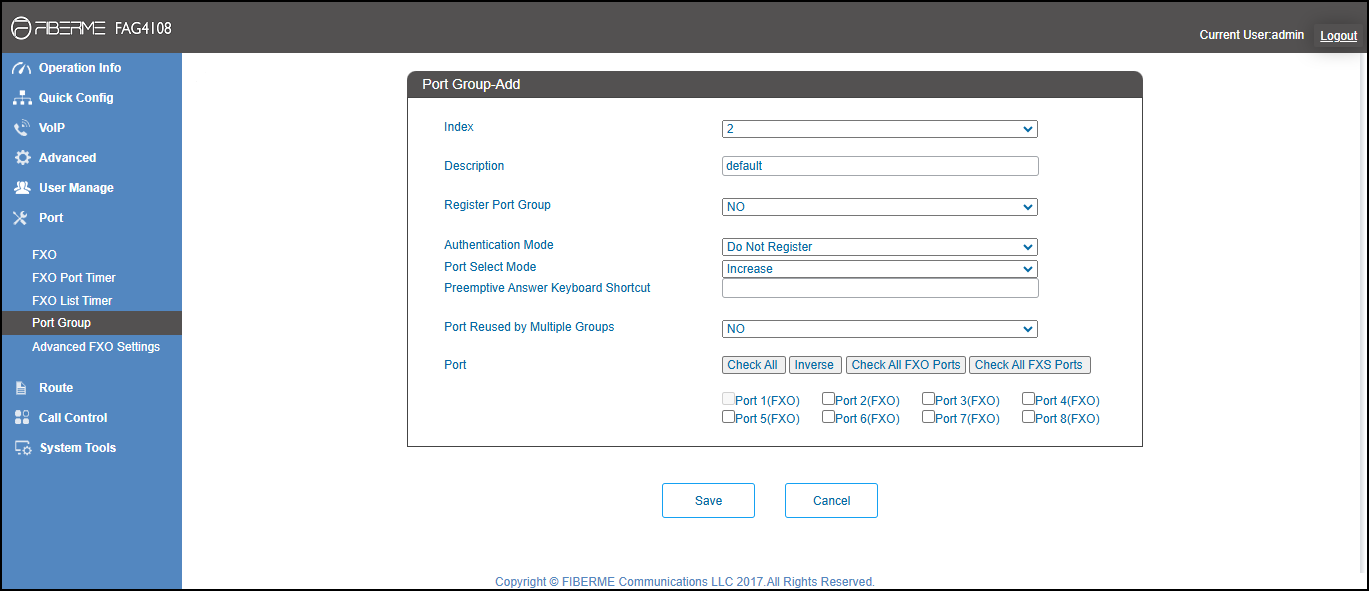
1- On the FAG410X web GUI, go to the Port->Port Group page and press “Add New”.
2- Select the FXO port you will use.
FAG410X CALL Routing#
Configure IP to Tel on FAG410X
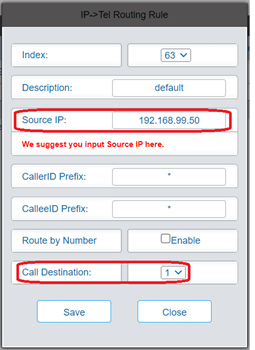
1- On the FAG410X web GUI, go to the Route-> IP->TEL page, Press “Add New”.
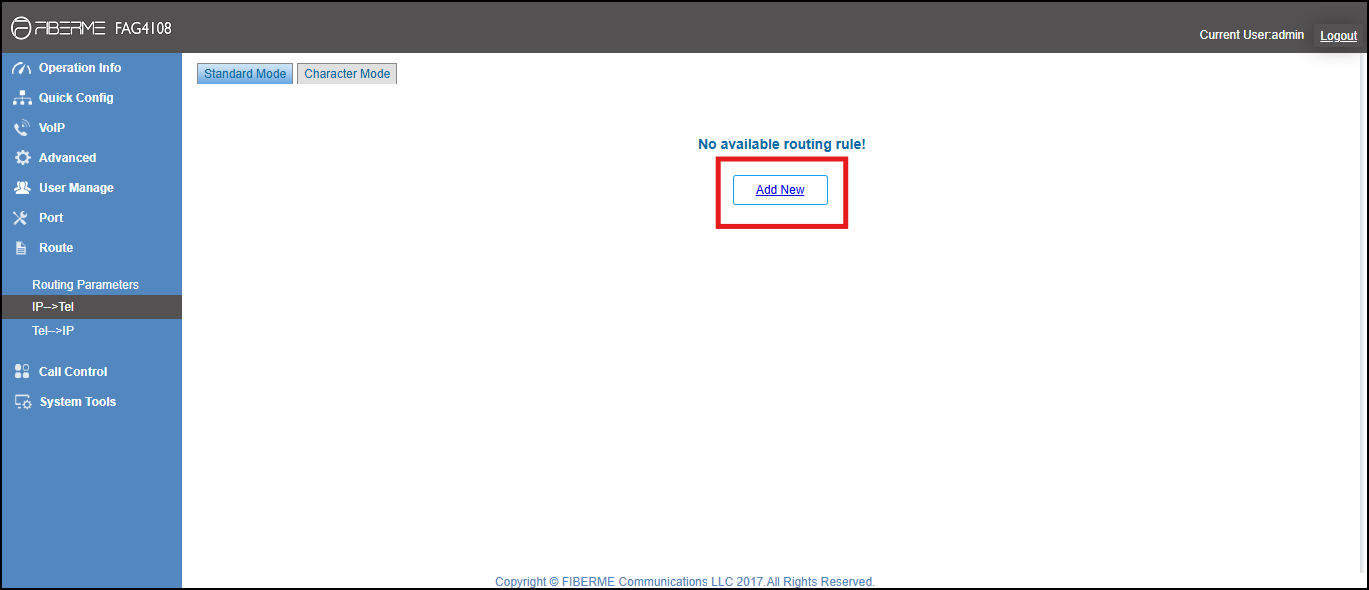
2- Enter the 3CX Server IP address in “Source IP” and select the Port Group you will use from “Call Destination”.
Configure TEL to IP on FAG410X
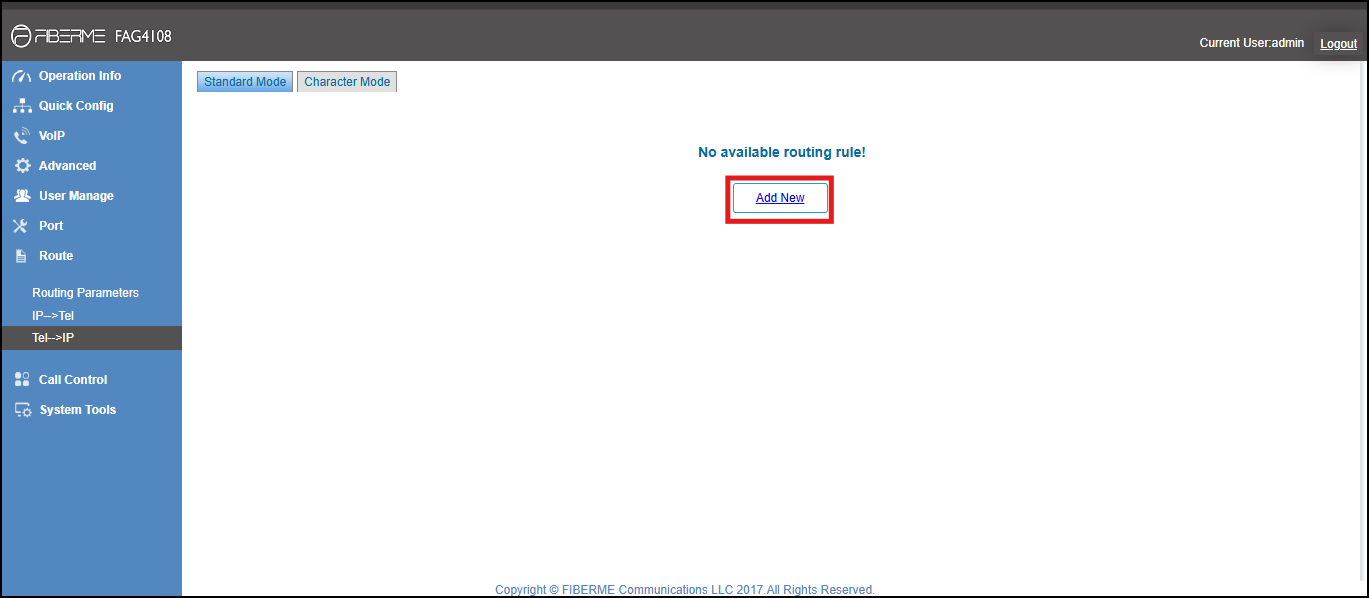
On the FAG410X web GUI, go to the Route-> TEL->IP page, Press “Add New”.
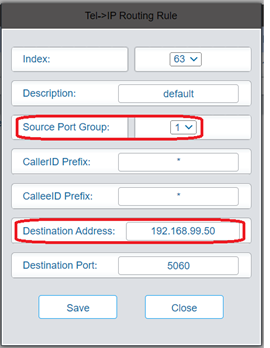
Select the Port Group you will use from “Source Port Group” and enter the 3CX IP address in “Destination Address”.
Still stuck?
FIBERME support can look at your setup with you. Certified Partners can also ask in the FIBERME Community, and anyone can learn the systems step by step in the free courses of FIBERME Academy.